|

|
First Light with SmartEye |
|
|
|
||
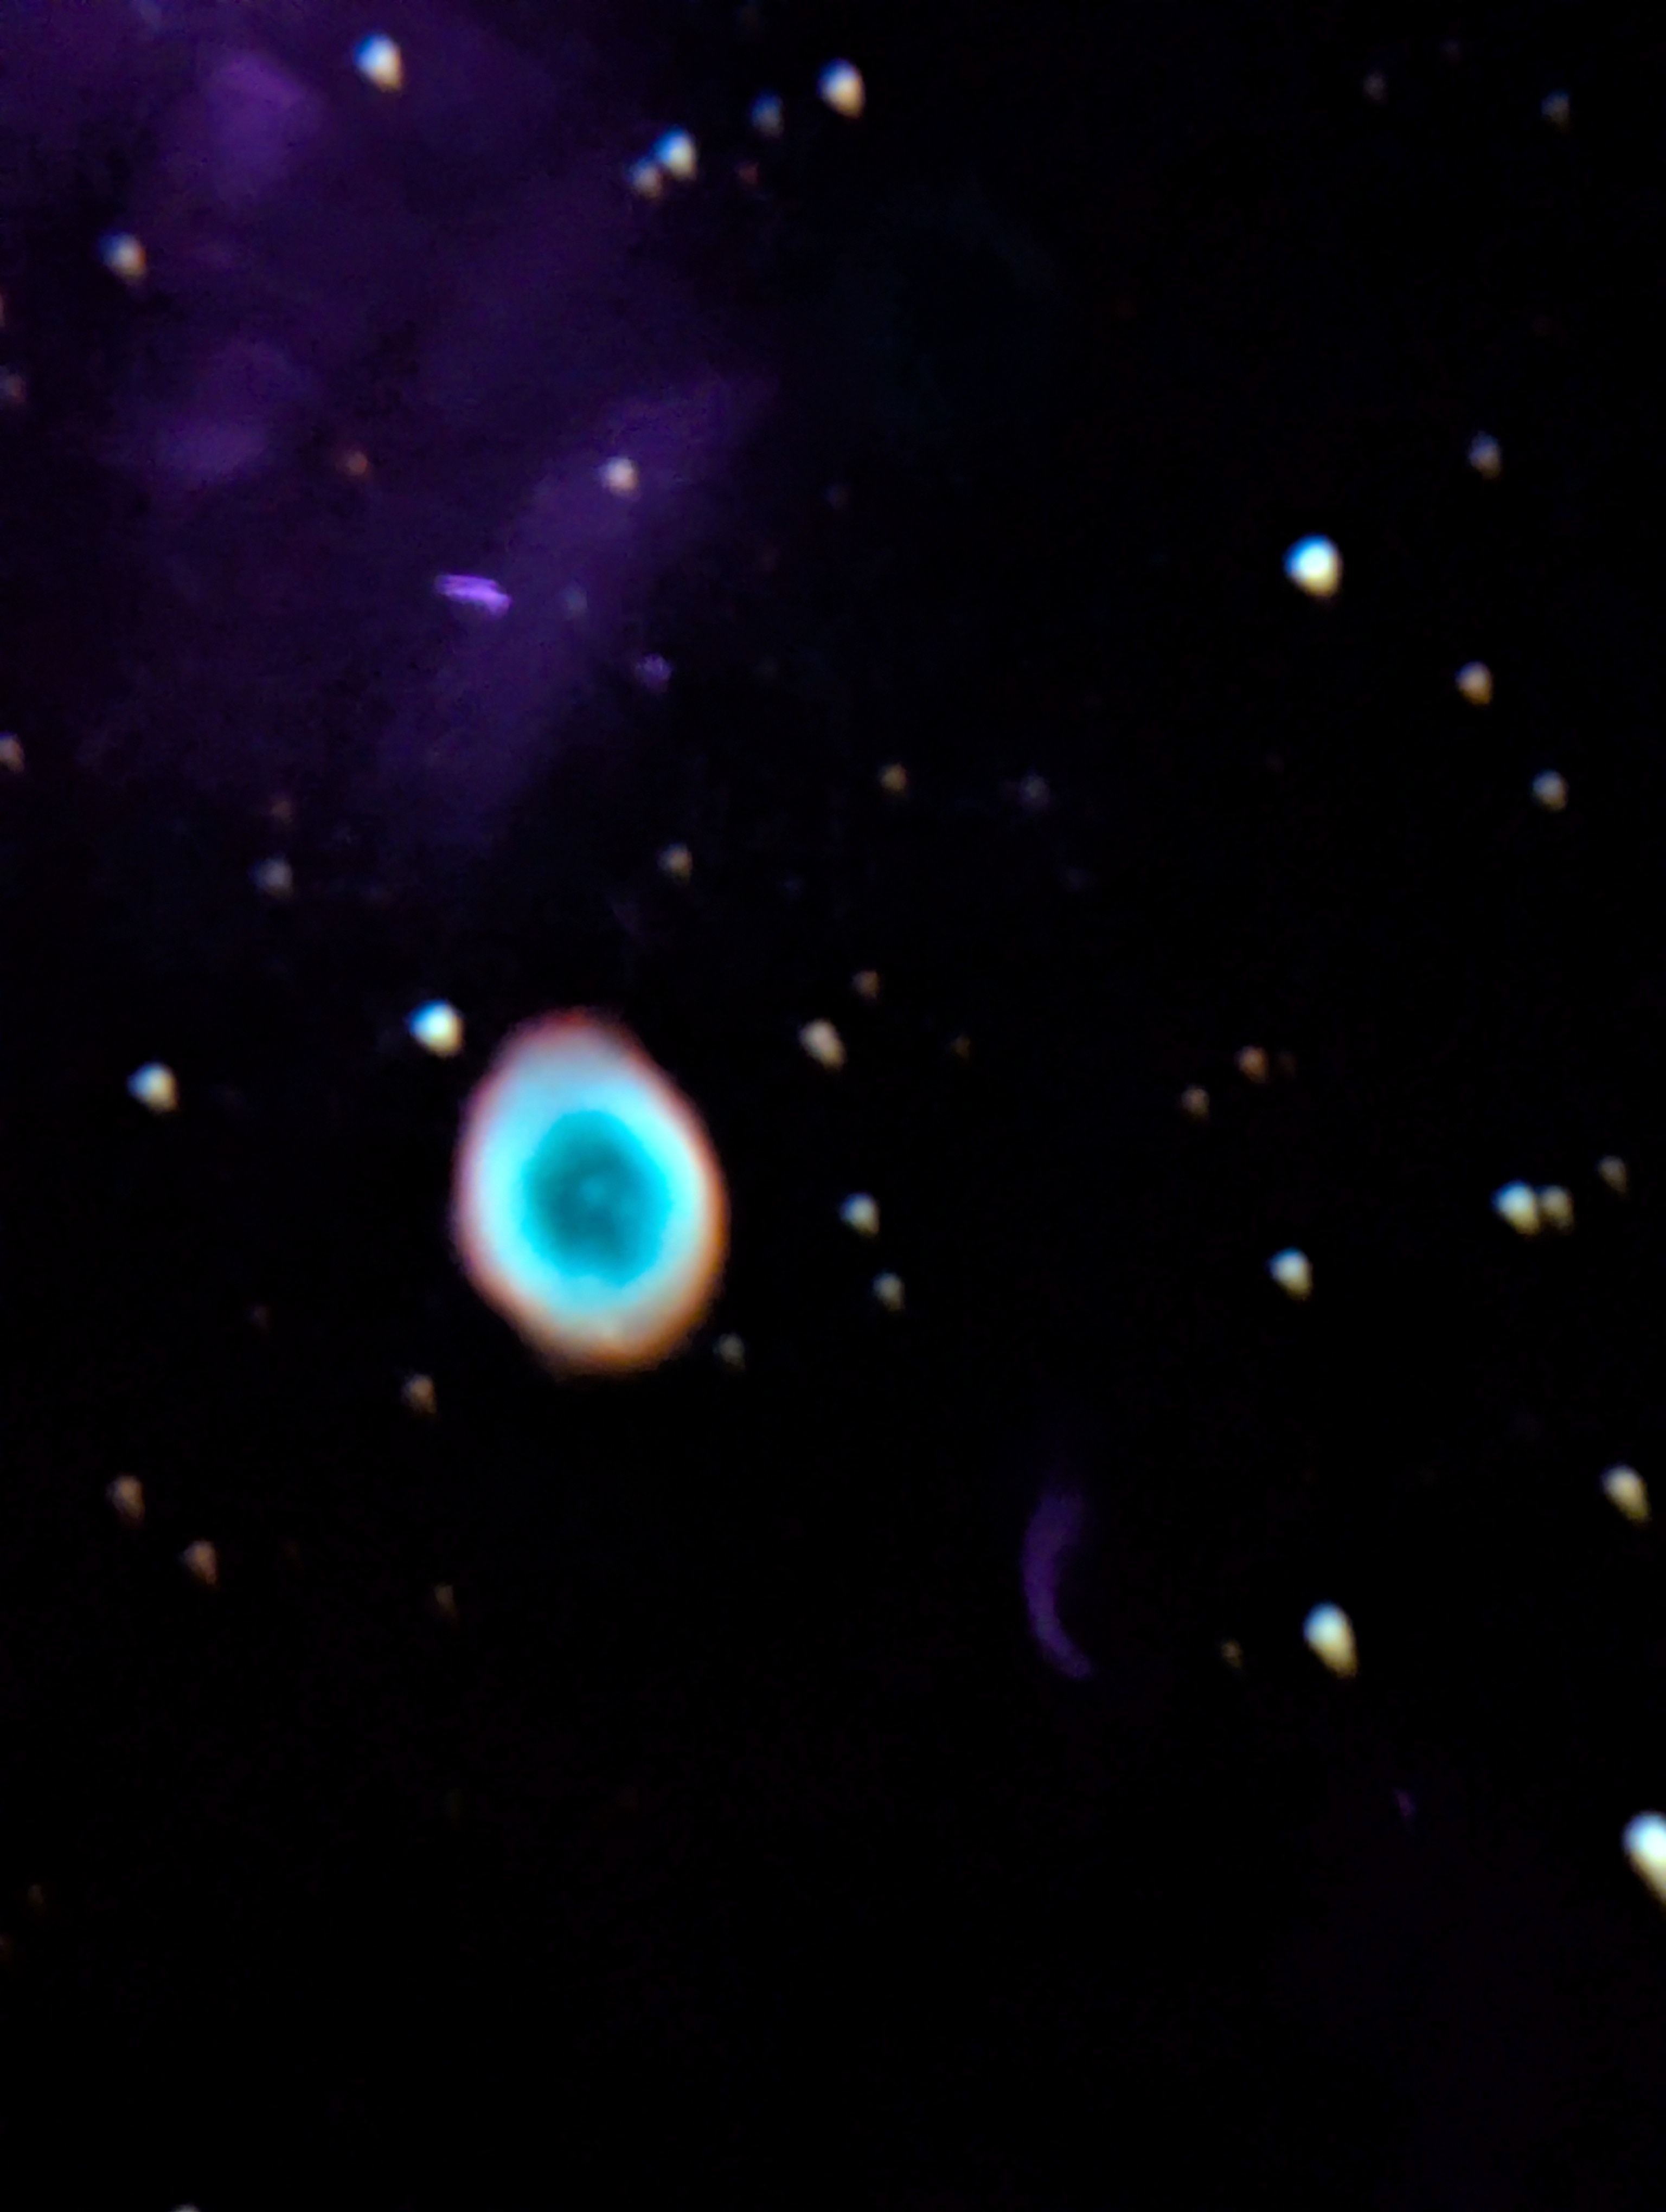
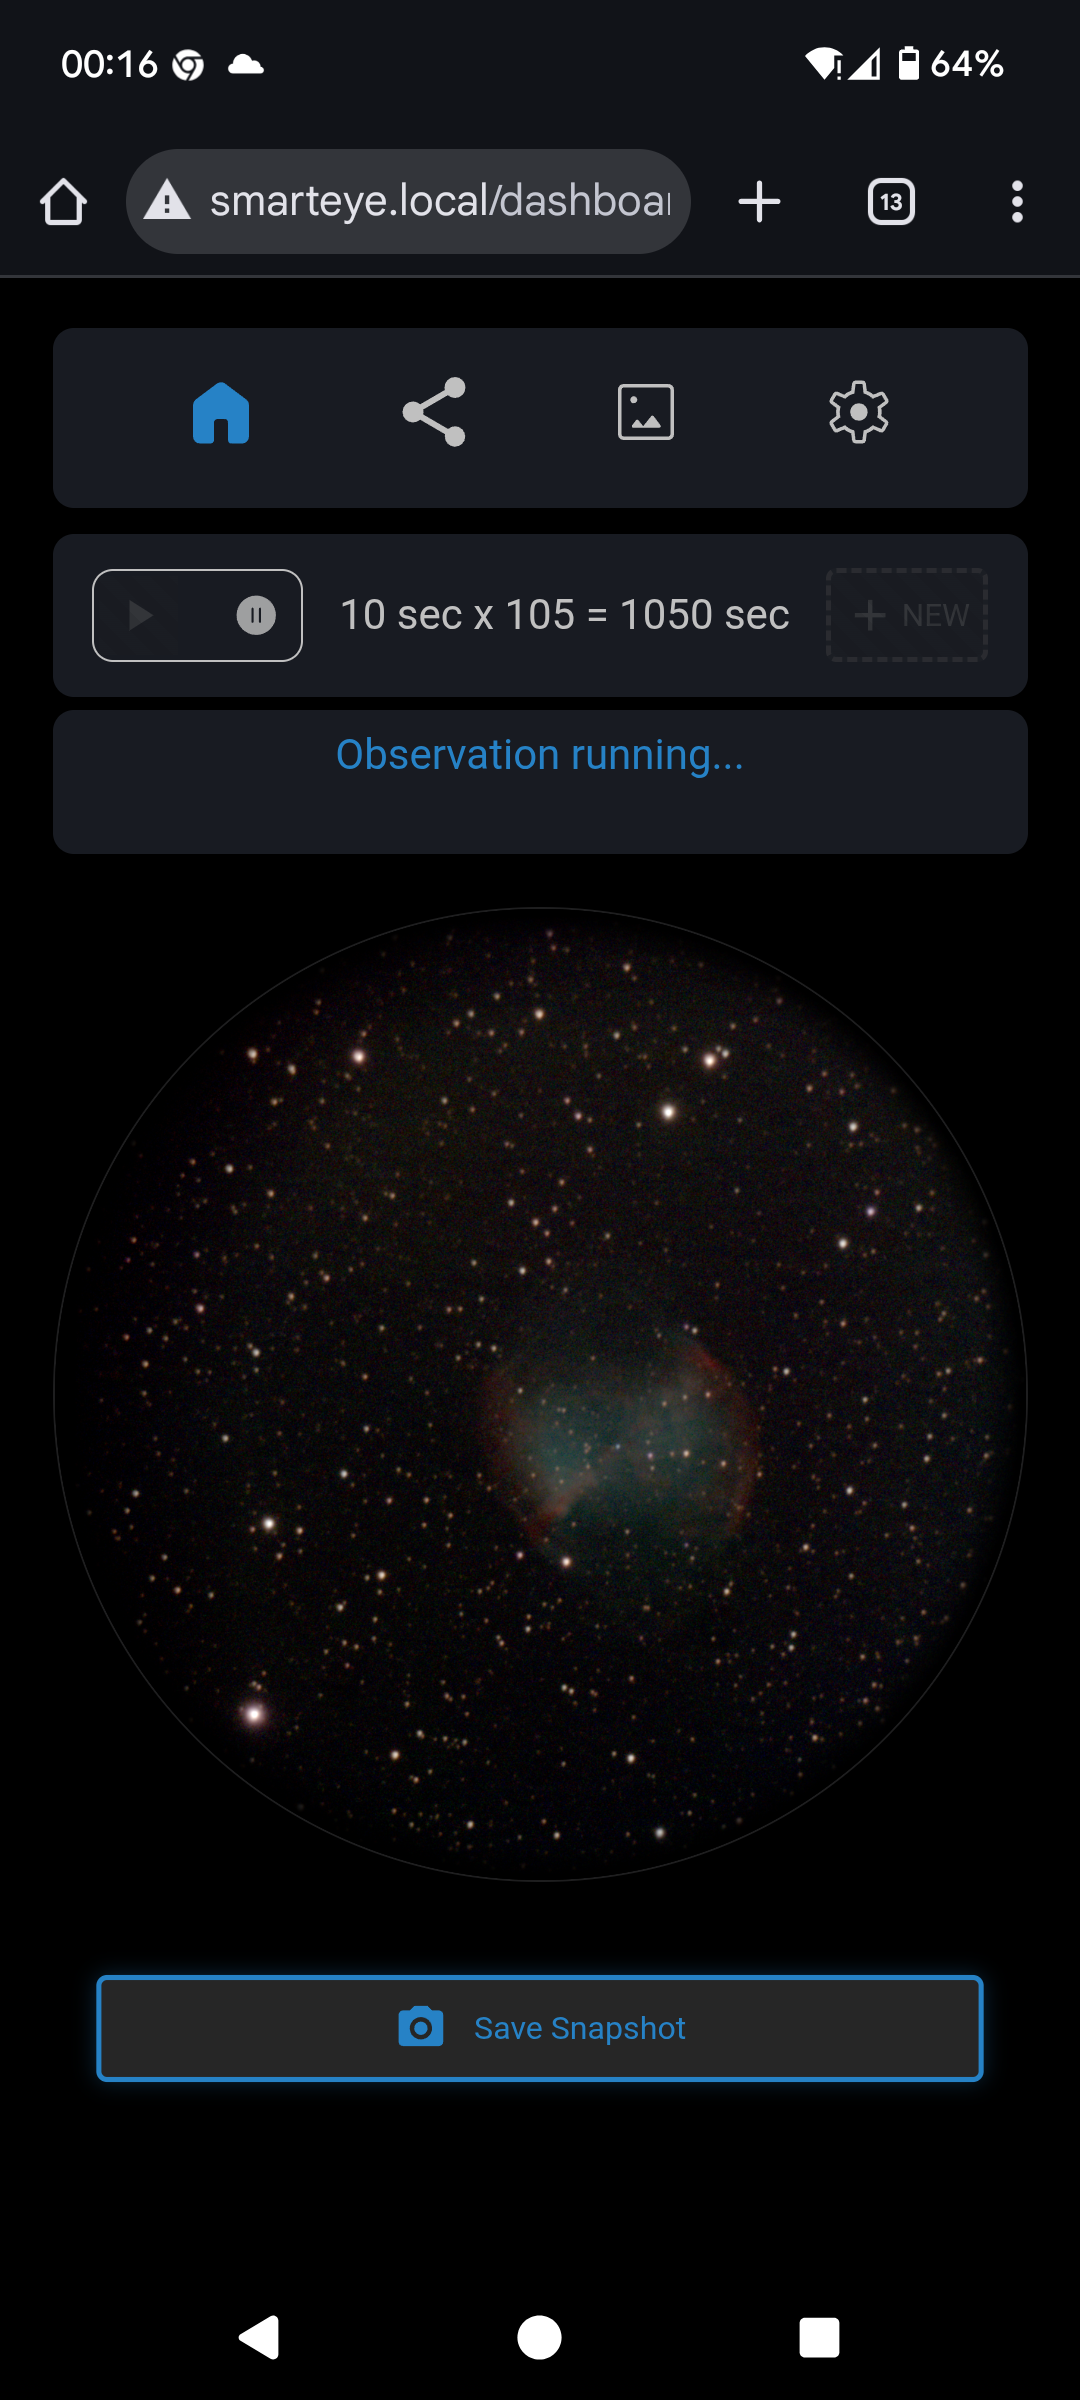
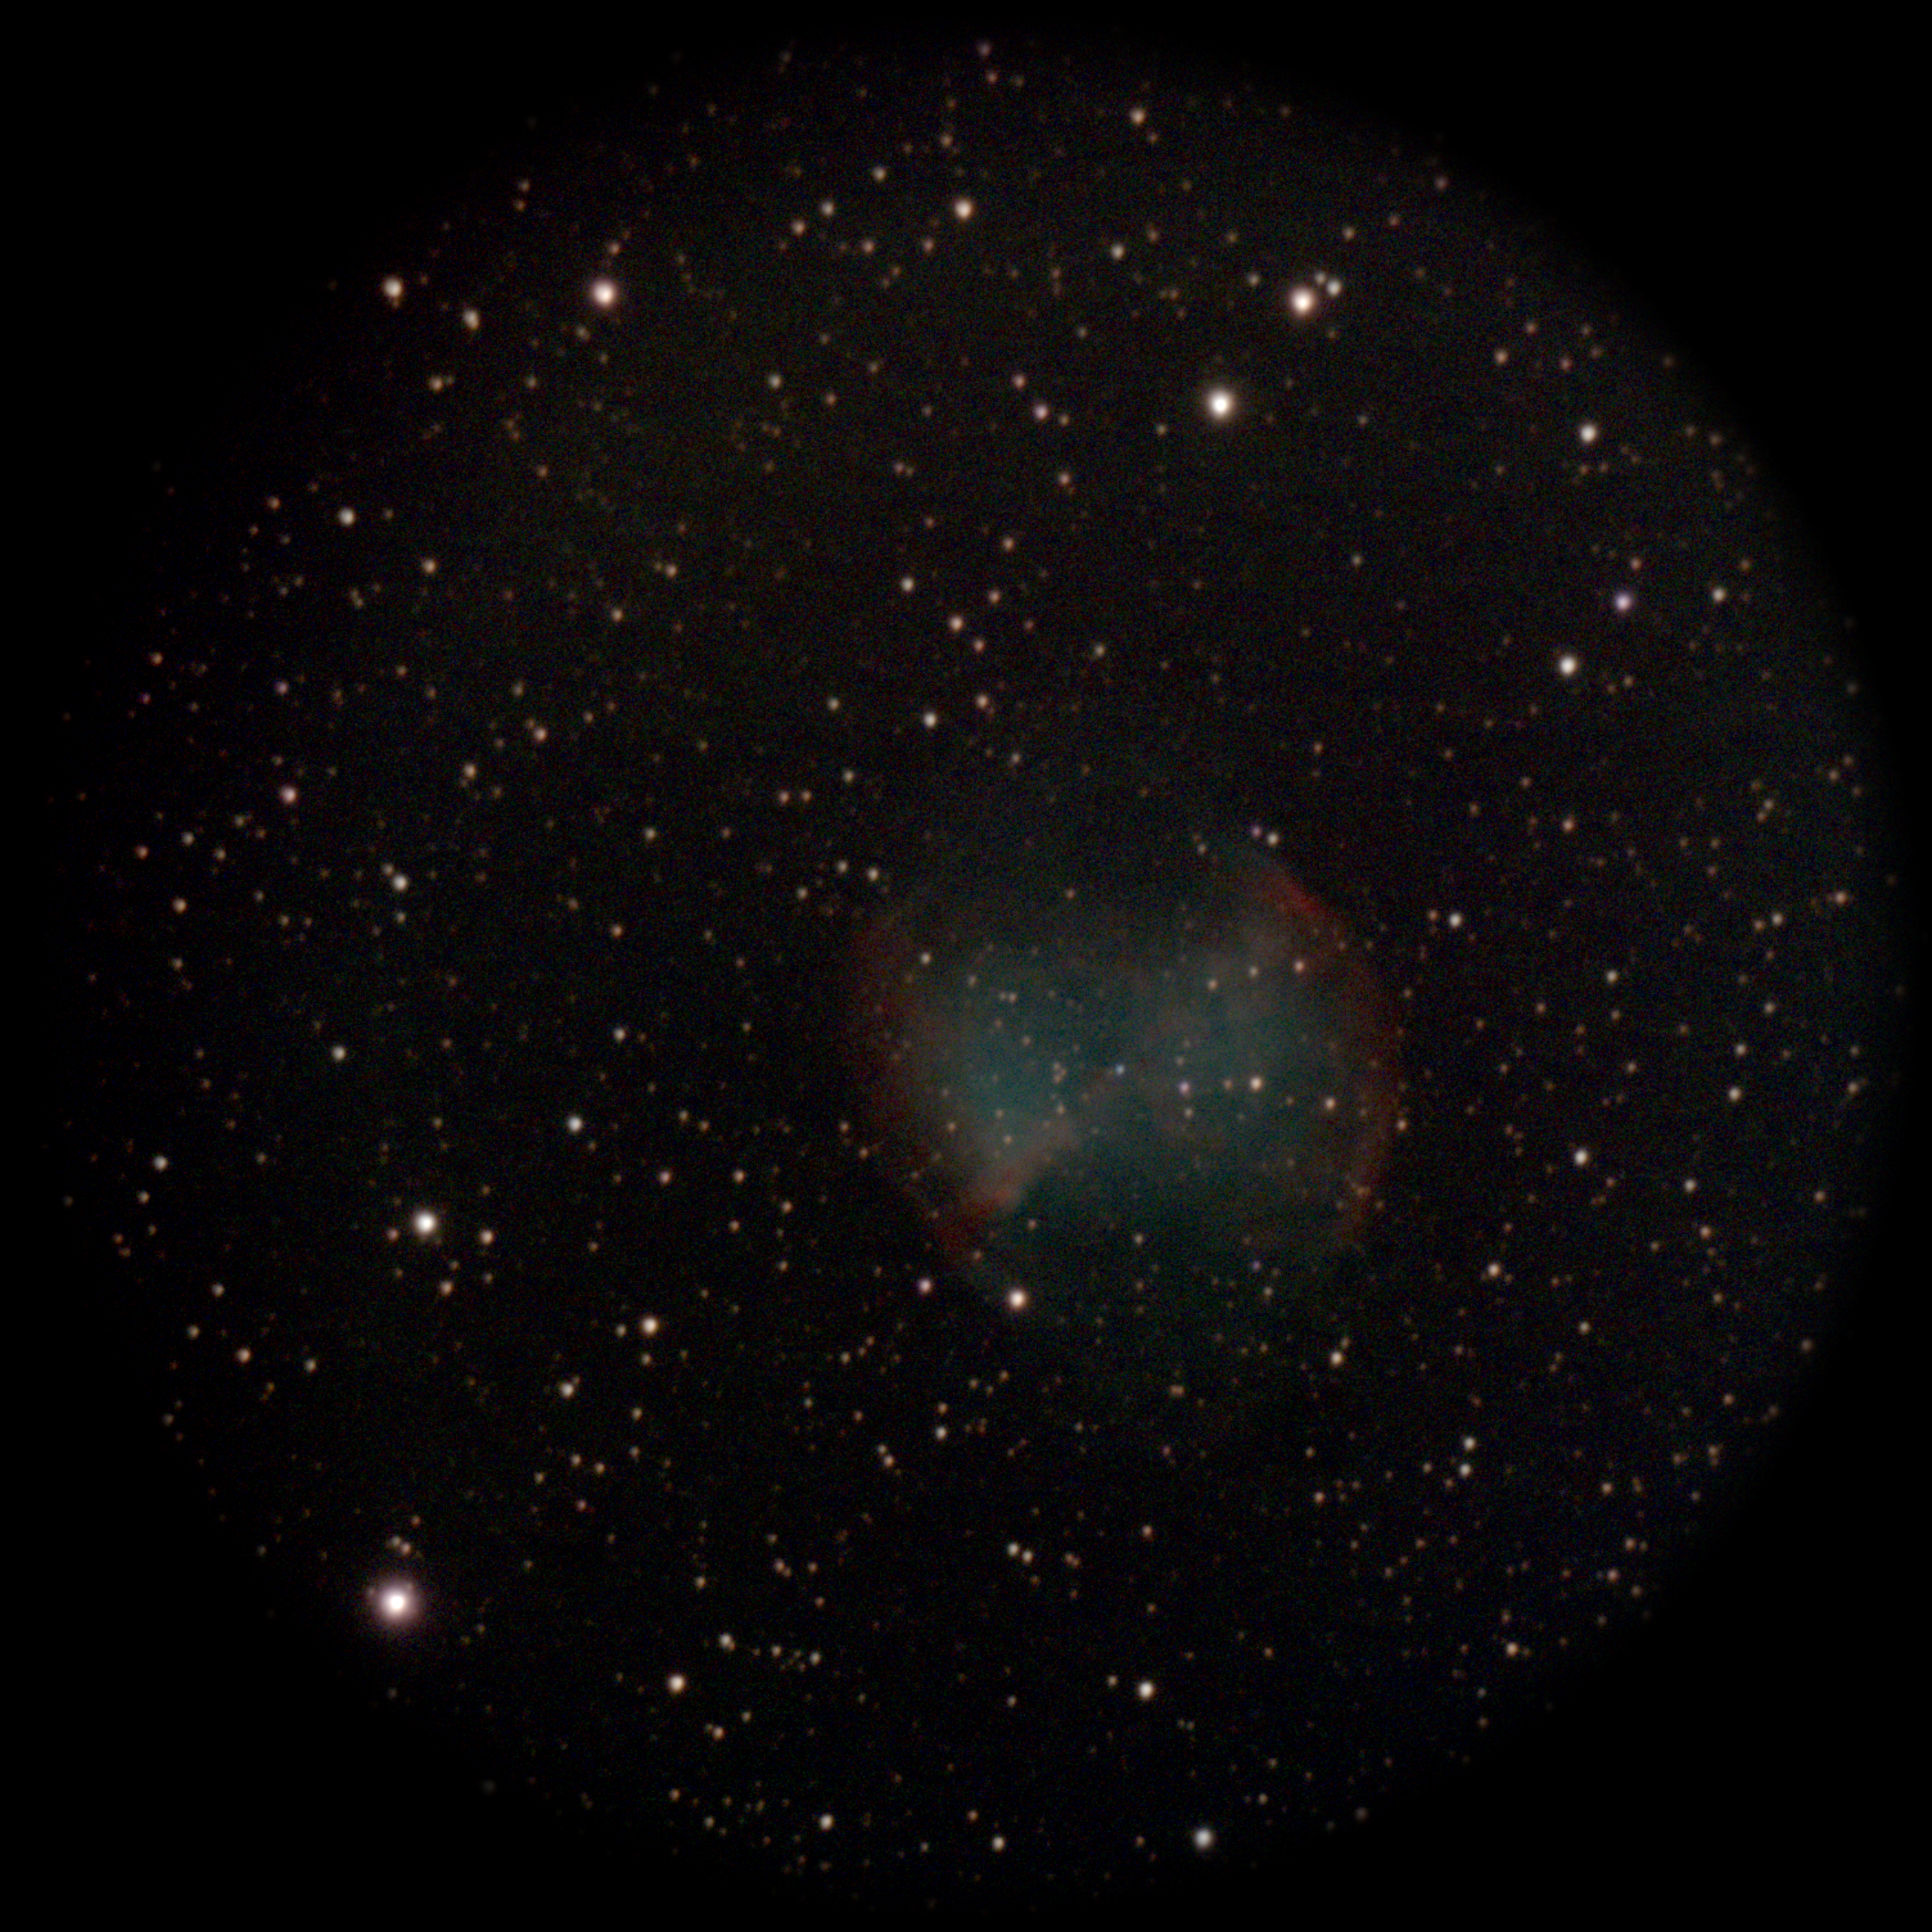
| Ring Nebula shot through SmartEye eyepiece with cell phone. | Dumbbell Nebula, streamed to phone during image acquisition. | "Snapshot" image saved during acquisition. |
These were some first shots with a Pegasus SmartEye eyepiece/camera. I was able to pick it up and amazingly had a clear evening until around midnight to try it out. During this time I only tried out its simplest, stand-alone functionality. Using it with Sky Safari to control my mount, or in astrocamera mode using programs like NINA are for another night.
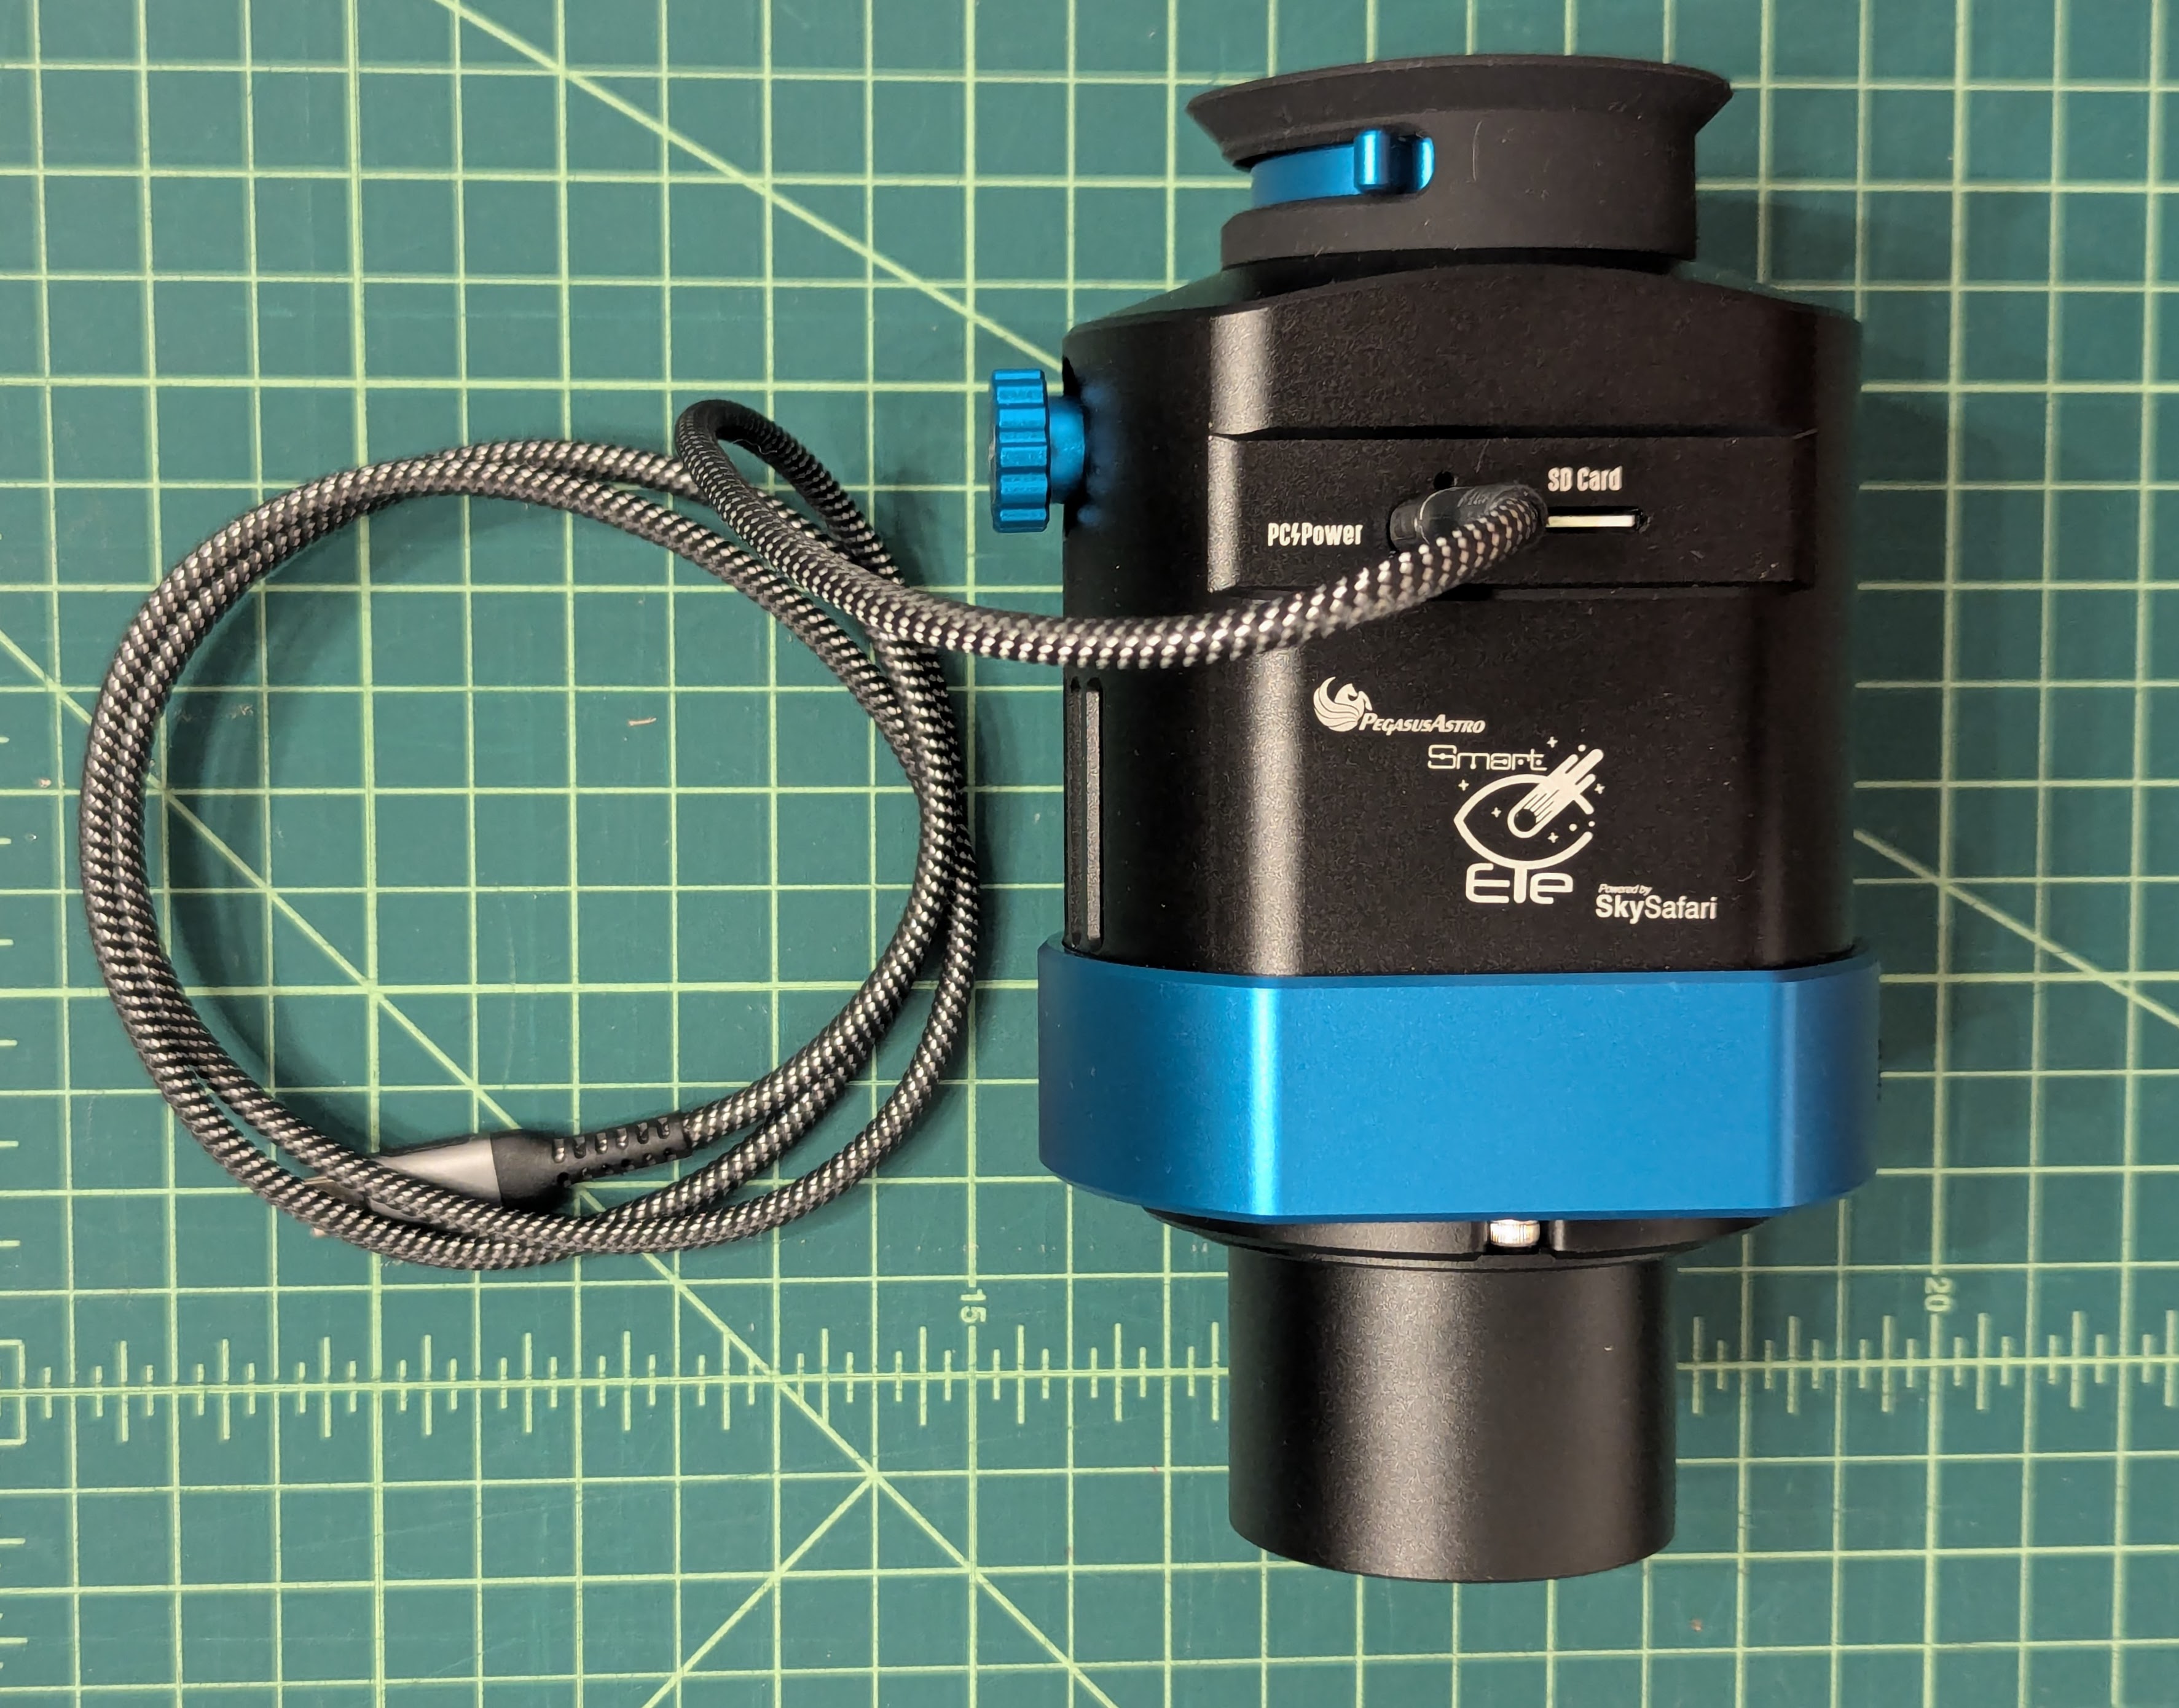 SmartEye with attached 2" nosepiece
and USB C power cable.
In eyepiece mode, it works as advertised, integrating a view of the target and displaying it on a high resolution display behind a lens, making it appear as though you are viewing an object directly. The equivalent glass eyepiece is about an 11mm focal length. Note that while you end up with a brightened view, it is NOT like using an image intensifier eyepiece. It is not a real-time view, but the view ends up in color, unlike the monochrome green of an intensifier.
At the beginning of the integration process, the view is presented in monochrome, much as your eye would see it normally through the telescope. As more frames are accumulated, the color image sort of crossfades in, which is an interesting presentation of the progress.
One of the things that concerned me is the useability of the SmartEye by people like me with glasses. It turns out that the 12mm of eye relief is OK if I press my glasses against the rubber cup. The diopter adjustment lever also makes it possible for me to use the SmartEye without my glasses.
The electronic display used is a high-resolution circular OLED display, probably normally used for a smart watch. Amusingly, this is a case of putting a round peg in a square hole as the sensor (Sony IMX533) is a square one, but the view you see is circular.
The scope I used was a C8 with the SmartEye connected straight in (no diagonal). This gives an ~2000mm focal length at f/10, which is slower than recommended, but on the bright targets I selected, that was not a problem. I used a straight-in connection as I didn't have my 2" diagonal handy as it was in my observatory, a 2-hour+ drive away. However, that's not recommended for obvious comfort reasons.
This session was under typical clear, but heavily light-polluted conditions for my suburban LA backyard. Visually I could only see Arcturus, Vega, and Altair. Presumably, Deneb would also be visible had it not been blocked by trees. Under these skies and long focal length, a go-to mount is a requirement to find faint targets. I used a G11 with Gemini 2 controller. The results are remarkable considering my terrible backyard conditions so one could be pretty confident about using this in an outreach event even in bad urban skies. The bright electronic display and rubber cup made it possible to "see" objects in my backyard (with streetlight on one corner). These would be impossible to see by eye since it's not possible to become dark-adapted in my backyard setting.
No doubt a lot of astroimagers would pooh-pooh taking a relatively easy way to see and image deep sky targets, but at the same time one has to appreciate the fact that the SmartEye is doing a lot in its small package - taking frames, aligning frames, stacking the frames, and then adjusting the stack to provide a viewable "final" image. Internal accelerometers are apparently used to detect motion during frame exposures and reject them for the stack. This works very well for me as my backyard is against a heavily traveled road which visibly shakes the view through a long focal length telescope, especially when a heavy truck rumbles by.
In use at outreach events, if someone touches the scope while the image is integrating, it should be no problem as the frame will be automatically rejected. It's also not a problem to use the control knob on the side of the SmartEye for the same reason.
Impressions:
- The unit is larger and heavier than I was expecting, but it's clearly a quality build.
- The selector knob/button seems to bounce (electronic switch bounce), making selection difficult at times.
- For comfortable use on a refractor or SCT, a diagonal is necessary. The SmartEye is shipped with a 2" nosepiece. A 1-1/4" nosepiece would be nice if it could be provided too. I had to put one together using an M54-to-M42 adapter + M42 1-1/4" nosepiece. Instead of requiring a diagonal, I would think that the viewing port could be put on a hinged assembly similar to the way modern DSLR or mirror-less cameras include at least a hinged rear LED display.
- As noted by some reviewers, once anything (e.g. nosepiece or external wi-fi antenna) is attached to the SmartEye, it won't fit back into the nice case provided.