|

|
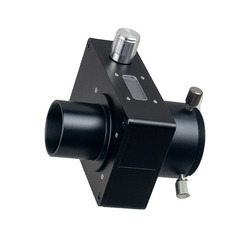
Adjustment of the Electronic Atmospheric Dispersion Corrector (eADC) |
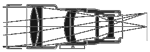
To initially adjust the eADC, one has to use a target close to the horizon and watch the colored fringes around the target. Naturally the seeing makes it harder to see the fringes, but I found that if I increase the camera gain, it's easier to see the dimmer fringes.
With the boiling of the atmospheric seeing, it's tough to see enough to adjust the eADC (see below). The fringes are more easily seen in the images at right which have been aligned and averaged using Autostakkert and boosted in saturation.
Before adjustments can be made, it's important to focus the scope well (best done on a star near the zenith), and then go to the target. A mount with a good go-to function and a large-ish image sensor is helpful. The large image sensor is also important as adjustments to the eADC setup will generally move the image off the sensor field of view. And it goes without saying that it helps to be using a color sensor so the red and blue fringes can be seen easily.
Fortunately the adjustment has to only be done once for the eADC. After that the scope can be freely slewed to any target and the eADC will compensate for any change in the target elevation and rotation of the camera. Internal nonvolatile memory stores the setup parameters so the eADC can be used after turning it off and back on without manual readustment.
The eADC adjustment is done using a knob on the unit to adjust two parameters while watching the colored fringes on the target. This can also be done using a PC and a program available from the manufacturer, but I find it's easier to just do it using the physical control. The adjustment values are visible in a little display next to the control knob.